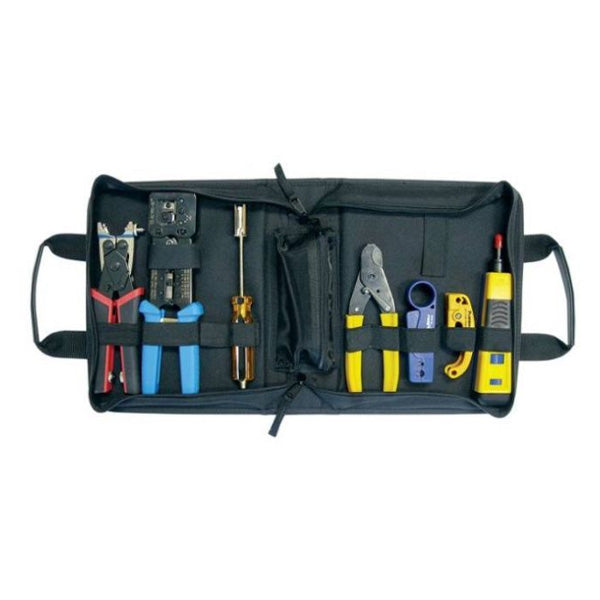
When setting up a hard-wired surveillance system, you may be overwhelmed by the amount of tools available just for making cables. But don't worry, you don't need every single cable tool for every CCTV installation. If you're wanting to know exactly which tools you need to get your cables ready for your security system, then this is the blog post for you.
What's inside a CCTV installer's toolbox? No matter what kind of cable you're working with, you're going to need a few basic tools. You'll need...
- a tool for stripping your bulk cables
- a tool for adding connectors to your bulk cables
- a tool for testing your bulk cables
Tools for Stripping Your Bulk Cable
If you're running your own cable, whether it's Ethernet or Siamese cable, you're going to need a tool to strip back the cable jackets to reveal the inner conductors. Since Ethernet and Siamese cables have different makeups, you will need a slightly different stripper for each. However, if you'll be working often with both types of cables, you can find a single tool that will work for both.
Ethernet Cable Stripper
If you're looking for a convenient way to strip your Ethernet cable for termination, you can actually use your modular crimping tool. While this tool's main purpose is to crimp the RJ45 connectors onto your Ethernet cable (we'll get to that in the next section), most crimping tools do have a simple stripper included. This means you will only need one main tool for working with your Ethernet cables.
If you're looking for something smaller to throw in your bag, something used only for the art of Ethernet cable stripping, check out this handy little stripper. You can pick this thing up for $10, and it's well worth every penny. This tool will strip cable diameters from .18" to .25" with no adjustments needed. You can simply switch from one cable size to another and strip away. It's designed specifically for Ethernet cables, so you don't have to worry about it nicking your copper wires.
Siamese Cable Stripper
If you're working with an analog CCTV system, you'll be using Siamese cables. These are not like Ethernet cables and will need a different cable stripper, one designed specifically for the diameter of the coax cable.
Coax strippers typically have two levels: a wider diameter for stripping back the outer cable jack and a narrower diameter for stripping the inner insulator. Additional features may include a textured braid comb, which is gives you a quick and simple way to pull back the outer copper braid.
You have a couple of different options for these coax strippers: preset and adjustable.
Preset Coax Stripper
A preset coax stripper, as the name implies, is preset to a specific size. These tools are faster and easier to use, but they're less flexible. You can only use them for one cable size.
While it may not be adjustable, it is simple, reliable, and can be purchased for under ten bucks. So if you know you're only going to be working with the industry standard RG-59 coax cable, this is a great addition to your installation tool box.
Adjustable Coax Stripper
While an adjustable stripper isn't as quick to use as a preset stripper, this is the ideal tool to have if you know you'll be working with different sizes of coaxial cable. Even if you think you'll only need one size, it couldn't hurt to spend the four extra dollars to grab this cable stripper. The last thing you want is to get to an installation site only to realize your cables are too big for your stripper.
Multi-Stripper
If you plan on working with both Ethernet cables and Siamese cables, then you may want to look into a multi-stripper for your cable-stripping needs. This tool can handle Ethernet cable, coaxial cable, and telephone/audio cable.
The Ethernet stripper on this tool is adjustable, so you can set this to whatever size you need. The coax cable strippers, on the other hand, are preset. That said, they can still handle RG59, RG6/RG6 Quad, and RG7/11 cable sizes.
Tools for Adding Connectors to your Bulk Cable
Once your cable is stripped, it's time to add your connectors. For Ethernet cables, you'll be using RJ45 connectors; for Siamese cables you'll be using BNC connectors. Both types of connectors are similar, but there are some differences you'll want to look out for when it comes to the tools you'll use to install your connectors onto the cables.
Crimp Tools
There are crimp tools for both RJ45 and BNC connectors, and they both work similarly. These tools work by crimping or crushing the edges of the connector around the cable.
RJ45 Crimp Tools
If you're going to connect an Ethernet cable to an RJ45 connector, this modular crimp tool is the tool for you. Simply line up your eight conductors, pass the cable through the connector and onto the cable jacket, insert the connector and cable into the crimp tool, and crimp away.
It's super easy to do, but if you need a visual aid, check out the video below.
BNC Crimp Tools
If you're connecting BNC connectors to the ends of your Siamese cable, you have a few more tool options available to you. Ultimately it's going to depend on the kind of connector you have. If you have a crimp-on BNC connector, it should come as no surprise that you'll need to use a BNC crimp tool.
Crimp tools and crimp-on BNC connectors are usually easier to and a bit cheaper to install, but these don't necessarily lend to the best installation in every circumstance. Since the crimp is uneven, it does usually form the connector and the cable into a hexagonal shape, which can negatively impact video reception. These connectors also don't last as long as other types of BNC connectors.
To use a BNC crimp tool, you'll simply slide the crimp-on connector onto the coax cable. If your connector has an outer sleeve, be sure to slide this onto your cable before trimming the cable.
After trimming the cable, pull back the outer layer of copper to reveal the inner insulator. Then trim back the insulator to reveal the inner copper core. It should be the same length as your connector. Slide the connector onto the cable, push the outer copper layer back up over the connector, and slide the connector's outer sleeve onto the connector.
Insert the cable into your crimp connector and crimp away!
Compression Tools
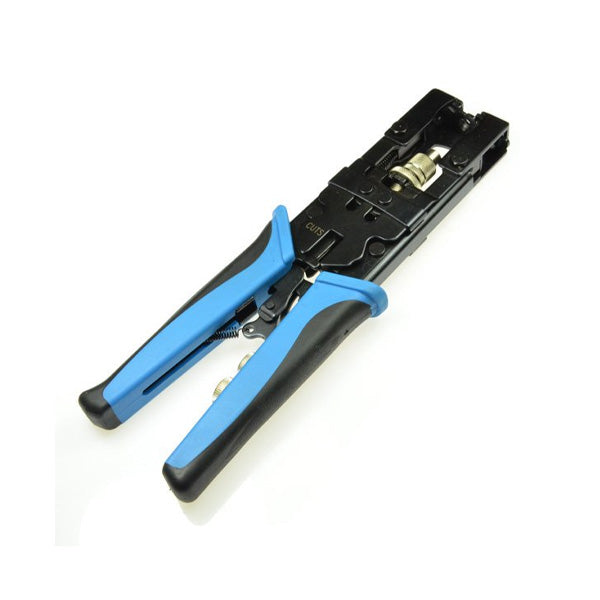
Compression tools are used with compression BNC connectors. These are a little more advanced and in some cases a little pricier, but they do lead to longer-lasting installations later down the road.
Unlike crimp tools, compression tools apply pressure equally around the whole connector. It maintains the circular shape of the connector and the cable and produces a tighter hold on the cable.
To use a compression tool, strip the cable and pull the outer copper layer back over the cable jacket. Strip the inner insulator to reveal the copper core and slide the compression connector on top of the cable. Trim the copper core to the same length as the connector.
Insert the connector into the compression tool and squeeze the handles to connect the BNC connector to your RG59 coax cable.
Other Cable Tools
As you're installing hard-wired security systems, there are a few other tools that you may find helpful. While these aren't necessary, they can be huge time savers!
Connector Assembly and Removal Tool
There's nothing worse than trying to screw your coax cable into place with an F connector when there's already a bunch of cables connected to your DVR. This handy little assembly and removal tool is a great addition to your tool box if you often work with coax cables. It helps you extend your reach and makes it 100% easier to install and remove F-type connectors in hard-to-reach places.
Cable Tester
When you're running and terminating your own bulk cables, you'll definitely want to test them out before you install your cameras, just to make sure everything is running smoothly and that all your data is moving effortlessly from point A to point B. To do that, you'll want to pick up one of these BNC and RJ45 cable testers.
The tester has two parts: the main body, which is battery operated, and a tiny remote, which is not battery operated. Simply connect one end of the Ethernet or coax cable into the main body and the other end into the remote. If the lights on the remote end start lighting up, you'll know that your cable is in working order.
For Ethernet cables, you'll want to pay closer attention to the eight lights on the remote. These lights represent the eight conductors inside your cable. You don't want your wires crossed or shorting out, so just double check that all eight lights are lighting up at the same time as the lights on the main body. For instance, when "2" lights up on the main body, you'll want to see the "2" lighting up on the remote as well.


