We are going to be looking at how to set up an IP system from scratch! It sounds like a big job, and it is, but we can break it down into steps that will make it easy to get going.
What Equipment Do You Need?

First, let’s make sure you have everything you’re going to need. You’ll need an:
- IP camera
- NVR
- PoE Switch (If your NVR isn’t already integrated with one)
- Cables for each camera and the NVR
- HDMI Cable
- Internet router or network switch
- Monitor
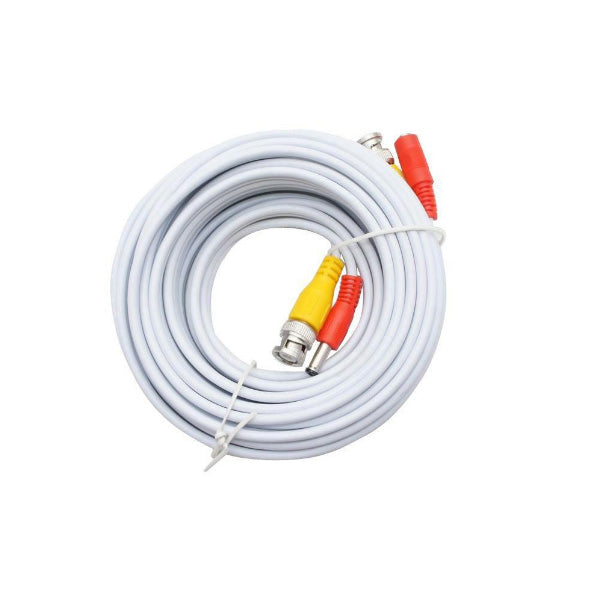
If you have all of these things, you should be able to get a system up and running. However, there are some things you can do when choosing your equipment that could make it a little easier. It’s usually best if your cameras and NVR are from the same manufacturer. You’ll be able to get by with mismatched equipment most of the time, but it will be a smoother setup using everything from the same manufacturer. You can also save yourself some time by getting pre-made cables. They come in a variety of lengths and they’re ready to go! If you’re working on a smaller project, this is definitely going to be your best bet. If you’re working on a larger project, you can save money buying your cables in bulk. These come in 500 and 1000 foot spools, and you’ll simply cut off as much as you need and crimp them yourself. If you need more info on this, we have a video showing how it’s done! You also don’t necessarily need an internet router or switch, meaning you’ll be able to set up a system without one. However, without an internet connection, you won’t be able to view your camera feed remotely. Now that you have all the equipment, you can get started setting up your system!
NVR Setup
You’ll start with getting your NVR setup. For this you’ll have four cables including the power cord that’s plugged into the wall, the ethernet cable that’s connected to the internet, the HDMI cable that’s connected to the monitor, and another ethernet cable to power the monitor. In the example in our video, we use a PoE powered monitor and we’re able to use the NVR to power it. This won’t be the case for all setups, so if you’re not able to use the NVR for power, you’ll just plug it into the wall! Any HD-TV or monitor will work. After you get all of these cables plugged in the correct spots on the NVR, you can flip the power switch and everything should start to power up. To navigate on the monitor, you’ll plug in the NVR mouse. Most include one, but any USB mouse will work. After everything powers on, you’ll get to a startup wizard. These will look different depending on the manufacturer, but you will just follow the prompts for getting setup. You will want to go into the network settings and enable DHCP if it isn’t already enabled. DHCP stands for Dynamic Host Configuration Protocol and enabling this just allows your internet router to automatically assign your NVR an IP address. This ensures your IP address is compatible with the network and makes sure the IP address is unique. Once you have enabled DHCP, it will assign your NVR a unique IP address. However, if you leave it on, it could change your IP address at any time. So, you want to make sure you turn it back off after it has been assigned. Always remember to jot down your IP address so you’re able to login to view your NVR.

IP Camera Setup
IP cameras can be powered and connected to the network with just one cable. This is going to look a little different if you are using an NVR with an integrated PoE or if you’re using a separate switch. We’ll take a look at what both look like.
Setup with Integrated PoE NVR
This setup is extremely easy and all you’ll have to do is plug the cameras into the back of the NVR to get going. This is called “plug and play” since all you’re doing is plugging them in.
Positives and Negatives of an Integrated PoE NVR
With an integrated PoE setup, the NVR and the cameras are operating on their own segregated network, and they’re not using any bandwidth from your main network. This also means that your NVR isn’t dependent on the main network, so you won’t lose recorded footage if there’s a drop in connectivity. This setup is the best choice for larger systems that will take up a large amount of bandwidth. However, you won’t be able to manage your cameras individually without going through the NVR. This could be time consuming when having to troubleshoot later on, but the ease and speed of this setup still gives it a huge advantage.
Setup with External PoE
There are lots of scenarios where you may need to set up your system with an external PoE switch. If your NVR doesn’t have integrated PoE or if you need to install your cameras more than 330 feet from the NVR, you’ll need to have a power solution. For this setup you’ll take two ethernet cables, one that’s connected to your NVR and the other that’s connected to the network, and hook them up to the PoE switch. Then you’ll do the same for your cameras. Depending on the manufacturer, you should see lights on the ports indicating that they are communicating, but your cameras and NVR are not talking to each other yet. To get them connected, you’ll need to get the IP address for each of your cameras. You’ll find these in the settings and it will look a little different between manufacturers. DHCP is even more important with this setup, since your NVR needs the IP address to communicate with the cameras, they cannot change. After you get the IP addresses, make sure to disable DHCP. Then, you’ll head back into the NVR settings and change the mode from “plug and play” to “IP Address” so you can enter in the IP addresses for your cameras. You can also set up your system with only a PoE switch, and not have your cameras connected to an NVR.
Positives and Negatives of an External PoE
An external setup will give you back some of that control by having everything on your network, and you’ll be able to adjust your cameras individually without having to go through the NVR. You’ll be able to access your cameras through a web browser, which is another plus for closer control over your system and will help with troubleshooting if problems come up. Some of the downsides to this setup are that unlike the integrated PoE and NVR, your cameras won’t be on their own separate network. They’ll be sharing it with your other devices and will be pulling bandwidth. This isn’t anything to be too concerned about with a smaller setup. However, the more cameras you add, the more bandwidth they’re going to take up. If you have a larger system or you plan on adding cameras later on, you’ll need to make sure your main network isn’t overcrowded. Another drawback to this setup is that your NVR is now dependent on network connectivity to record video. If there are ever network failures or interruptions, you won’t have recorded footage during that time.
Recording Footage
Your cameras on their own are only taking in video. Without something to record the footage, you’ll only be able to see what’s on your camera in real time. You can think of the camera like an eye and the recorder like the brain. If you don’t have somewhere for the information to go, you won’t be able to review any of it. So, you have to have somewhere for that information to go, and that’s where a hard drive comes in. Recorders come with hard drive bays, sometimes several, for you to connect a hard drive to store footage on. You’ll most likely have to install the hard drive yourself unless you buy them from Nelly’s, we’ll do it for you. If you are doing it yourself, it’s not too difficult. You’ll simply take off the cover of your recorder and connect the hard drive with the power and SATA cables to the hard drive bays. After that you’ll screw the hard drive into the corner of the recorder. Typically the cables and screws you need to connect the hard drive will be included with your recorder. Once you have your hard drive installed, you’ll be able to go into the settings for your NVR and choose when you want to be recording footage to your hard drive. You can set a specific schedule or time you want to record, and then you’ll be able to access a copy of that footage whenever.
Remote Access
One of the biggest reasons to have cameras is to be able to check them while you’re away. So the last step of getting your system setup is to make sure you’re able to access your cameras from anywhere. This is really easy to do, but it will vary some depending on the manufacturer of your equipment. Most IP systems use P2P cloud accounts for managing your footage. P2P stands for peer to peer and it’s simply a go between that facilitates communication between the network your camera is on and the network of the device you’re using for remote viewing. Different manufacturers use different versions of P2P accounts, so yours could simply be called P2P or it could have a brand name. Here are some common manufacturers and platforms they use:  Whichever it is, you’ll want to make sure it's turned on. To do this, you’ll go into your recorders’ settings and enable the feature. You’re going to need to set up an account on whichever host you’re using, so follow the prompts to do that. Once you have an account, you’ll be able to add your device. You’ll be able to add your device manually by inputting the IP address, but if you do this, you won’t be able to view it remotely. Adding it manually will only allow you to access your cameras when you are connected to the same network. To view remotely you’ll need to scan the QR code in your recorder’s settings. This will allow you to view your cameras anywhere in the world as long as you and your recorder both have an internet connection. If you want to checkout more on accessing your cameras remotely, you can check out our other post How to View Your IP Security Camera Feeds Remotely Using Uniview & R-Series .
Wrapping Up
If you’ve made it to the end of this post, you’ve probably finished setting up your IP camera system. Congrats! These devices are usually pretty straightforward and are meant to have an easy setup. If you’re still confused or if you’d like to see the process in action, the video below shows the step by step process! If you still have questions, we have tons of other videos going into more detail of the steps and equipment used, as well as a team of expert techs that are a chat or phone call away!


